Some of the pictures of the work done in 2002.
This page has a lot of photos, it may take some time to load. You have not seen everything until you see the message "end of page" at the bottom.
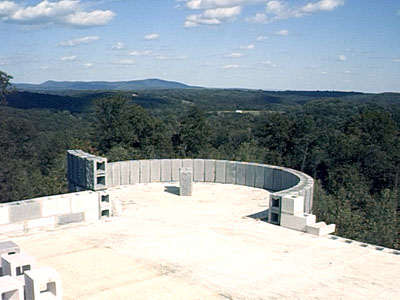
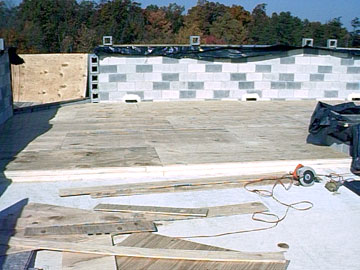
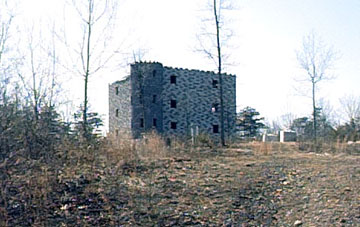 The castle as it looks at the start of a new work year. This photo was taken March 6, 2002. The indentations around the top are not crenelations, they are just blocks we placed there to hold down the temporary tarp we have over the roof.
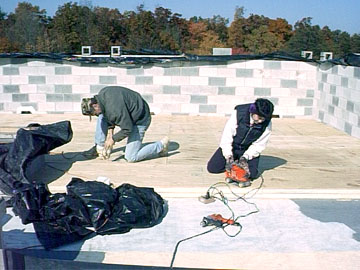
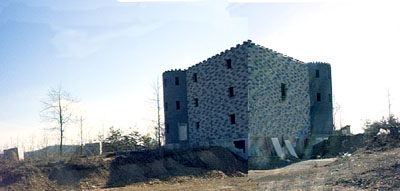 Another picture from a different angle, also taken March 6, 2002.
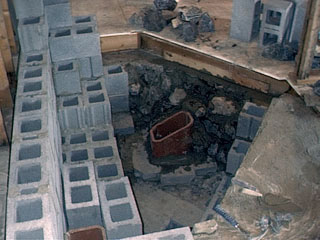
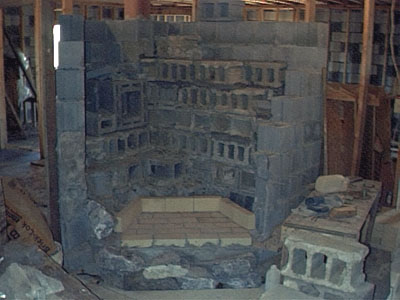 The next thing we need to do is to get started on the fireplace stack. This is what the first floor fireplace looks like now. We need to finish this fireplace, and then move up to the second floor and build a fireplace there, and then it's on to the third floor where there will be another fireplace. We expect to get started for the year about the first part of April. We need to finish all the fireplaces and the chimney before we can get the permanent roof installed.
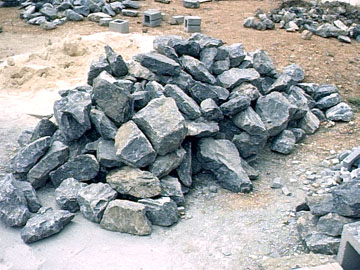 I have been asked when we would start putting up more photos. We have been slow getting started this year, in part, because we had a problem with Baltazar (our dog). He had to have surgery, and we almost lost him. It was stressful, and we lost some time. So far this year, I have picked up 3 tons of stones (in photo) which we will be using to face the fireplace on the first floor. May 4, 2004.
 Also, I got a chance to get started to work on the fireplace. To the right near the bottom, you can see the stones that I have started putting in place. The entire front and side of the fireplace will be made of stone when finished. May 4, 2002.
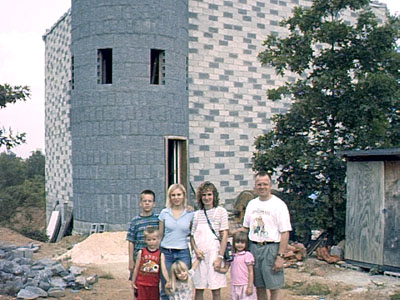
 This is Lou Ann and her husband Andy, they are from Tennessee. They stopped in for a short visit while on their honeymoon. They also visited several other castles.
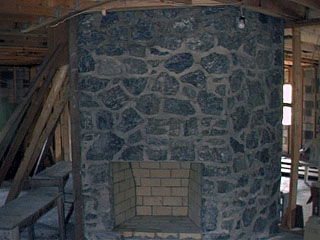
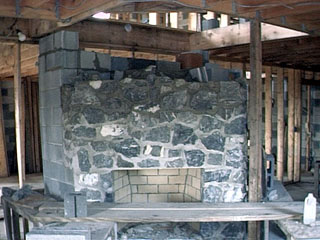
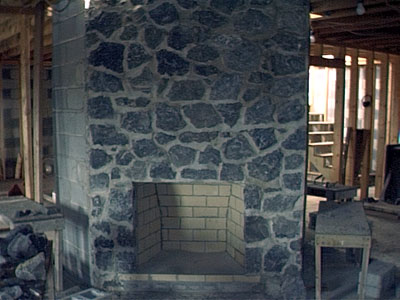
 The work on the fireplace is coming along. We are about half finished with the stone work.
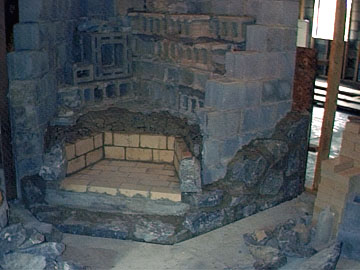
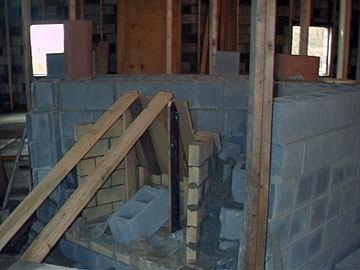
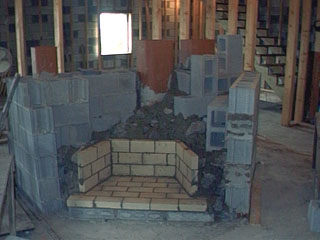
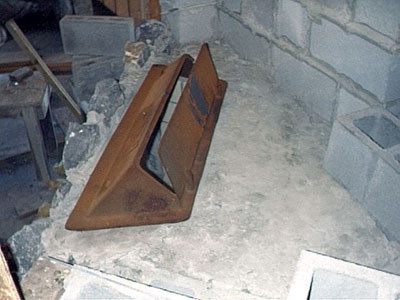
 This is the opening where the damper will be placed. The area behind the damper will be the smoke shelf, and the area directly above will be the smoke chamber. The walls will be brought in at an angle up to the point where they meet the flue pipe.
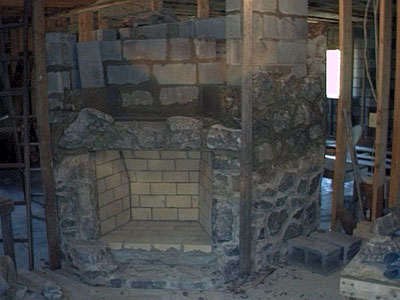
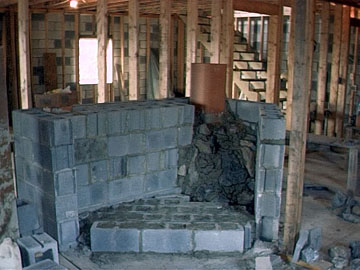
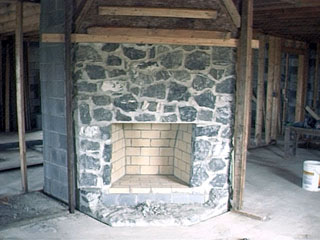
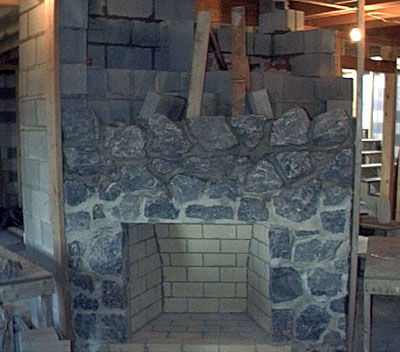
 5-30-02 - The work on the first floor fireplace is almost finished. We still need to finish the raised hearth, which we will do later. You need to imagine this with a large shield with two crossed swords behind it hanging above the firebox.
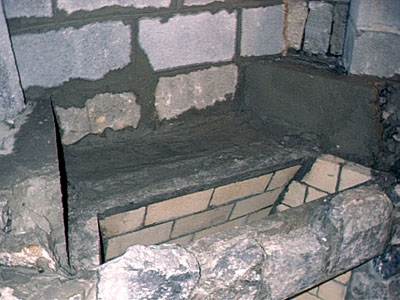
 5-30-02 - This is a picture taken from the floor above. You can see the flue liner which which will be connected to more flue liner which will be part of the chimney that goes up through the roof.
 6-8-02 -We have started work on the second floor fireplace. There are now a layer of 8 inch blocks on the floor of the fireplace. The blocks have been filled with cement to make them solid. I will place a layer of mortar on top to make a smooth surface, and lay the firebricks for the floor of the firebox over the mortar.
 6-14-02 - The work continues on the second floor fireplace. I have a slanted board in place so I can lay up the back upper bricks at an angle. After the bricks are put in place, I pour concrete around them. There will be 8 inches of solid masonary around the bricks in the firebox.
 6-19-02 - The work continues on the second floor fireplace. We are now about half finished with it.
 6-19-02 - We had visitors from Idaho. The Peck family stopped by to see what we were doing. We hope they enjoyed their visit.
 6-28-02 - We are still working on the fireplace. Things are going slowly because of the weather. It has hit 97 degrees here a couple of times in the first part of July.
 7-22-02 - The second floor fireplace is now finished except for the raised hearth which will be done later.
 7-23-02 - We are now working on the third floor fireplace. Once we get the chimney up through the roof, we can start work on getting the permanent roof installed. It will sure be nice to have a rain proof roof.
 8-8-02 - This is where the damper will be placed. The flat area behind the damper will become the smoke shelf.
 8-10-02 - We are now about 2/3 finished with the third floor fireplace. The chimney portion is almost up to roof level.
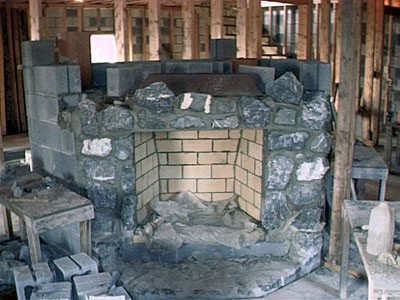
 8-25-02 - The front of the third floor fireplace is now finished, except for the raised hearth which I will do later.
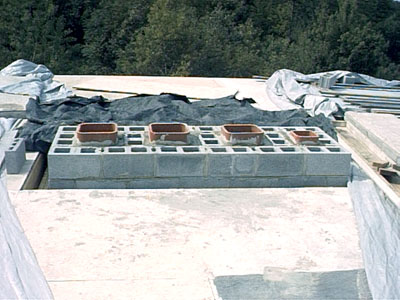 8-25-02 - This is what the chimney looks like coming up out of the roof. The flues are from the first floor fireplace, the second floor fireplace, the third floor fireplace, and the oil furnace which will be in the basement. After the permanent roof is installed, it will cover the blocks and from that point up, the chimney will be made out of stone.
 9-11-02 - We have finished row 44 on two walls and both towers. We need to finish all of 44, and three or four more rows before we can put down the insulation and the EPDM (rubber) roof.
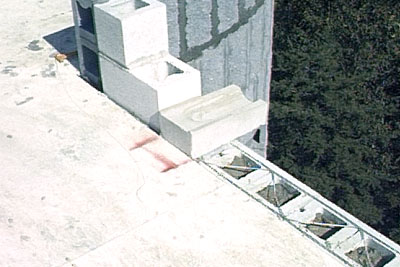 9-11-02 - This is a scupper, it moves the rainwater from the roof area and sends it through the block wall and over the side. There will be four of these on each of two walls. We made these ourselves for about a dollar each after finding out that real scuppers cost about $70 each at the store. Before the EPDM goes down, there will be 4 inches of poly-iso insulation and 1/2 inch of plywood. This will raise the roof up to just over the top of the scupper.
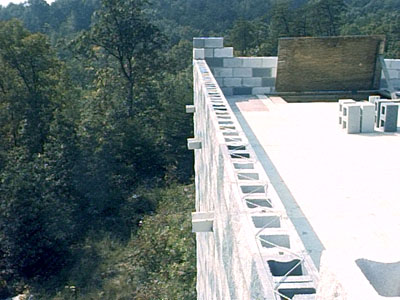 10-2-02 - In this photo, you can see three of the four scuppers that exit this wall. With any
luck, someday, water will shoot out from these scuppers. You will notice that we have finished more
rows of block. We have now finished row 46. We expect to do 49 rows and then get to work
on installing the rubber (EPDM) roofing material.
10-2-02 - In this photo, you can see three of the four scuppers that exit this wall. With any
luck, someday, water will shoot out from these scuppers. You will notice that we have finished more
rows of block. We have now finished row 46. We expect to do 49 rows and then get to work
on installing the rubber (EPDM) roofing material.
Probably sometime next year, we will finally add
the merlons (the part of the crenelations that stick up above the wall). After we crenelate the
walls and towers, the place will finally start looking like a castle.
 10-7-02 - Rob Dekarske drove for 8 hours each way to come and volunteer two days of his time to help build the castle. He does great work, and we appreciate his visit. Rob has the distinction of being the first person to spend the night in the castle. Come back anytime Rob, we have a trowel waiting for you.
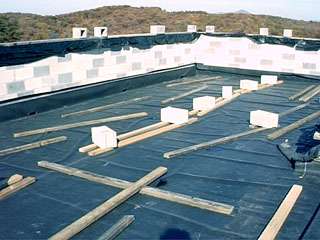
 11-2-02 - We have installed two 2 inch layers of poly-iso insulation and covered it with a
sheet of 1/2 inch plywood. So far, we have finished the front half of the keep. We will cover this
with EPDM (rubber) roofing material. Also, notice that the walls are finished except for the
crenelations.
11-2-02 - We have installed two 2 inch layers of poly-iso insulation and covered it with a
sheet of 1/2 inch plywood. So far, we have finished the front half of the keep. We will cover this
with EPDM (rubber) roofing material. Also, notice that the walls are finished except for the
crenelations.
 11-2-02 - Our friends T.O. and Shirley came up and donated a couple days of their time to help out.
They are both talented, dedicated workers, and things went much faster because of them. I should also
mention that is was below 40 degrees and windy most of the time they were there. Their visit is
much appreciated.
11-2-02 - Our friends T.O. and Shirley came up and donated a couple days of their time to help out.
They are both talented, dedicated workers, and things went much faster because of them. I should also
mention that is was below 40 degrees and windy most of the time they were there. Their visit is
much appreciated.
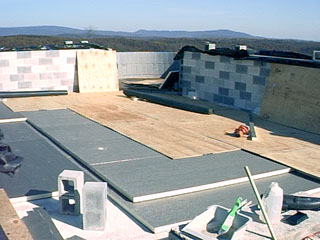
 11-8-02 - The front half is now covered with EPDM. It is not yet glued down, we need to wait for a couple of warm days. Having the rubber down should help keep the inside of the keep dry even if we are not able to finish gluing everything together. The holes at the scuppers are open to let the water out. The 2X4's and blocks should hold the EPDM in place temporarily.
 11-8-02 - This is the back half of the keep. We getting the insulation and the plywood installed. We will cover it with EPDM the same as we did on the front half. If we get a couple of warm days, we should be able to get it glued down and the seams joined.
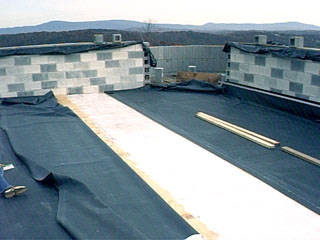 11-15-02 - In order to glue the EPDM to the plywood, we folded the rubber back and applied the glue to the plywood. Then we folded the rubber back into the glue and pressed out any air bubbles we could find. Then we folded it over in the other direction and did the same thing again. The sheet on the right has already been glued down. We start at the roof edge, and work toward the higher middle area. We are using the type of glue that does not set immediately. This type of glue is a little more expensive, but if we make a mistake, we can move the rubber around a little to get it right before the glue sets.
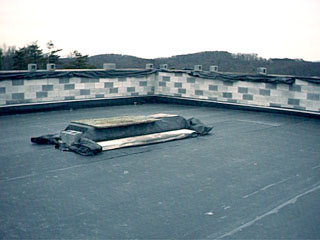
We now have all of the rubber glued to the plywood, but we have not yet glued the seams together (this takes a different type of glue). We need a few days of dry weather to get the seams done.
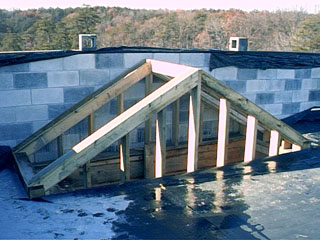 11-20-02 - This is the begining of the structure which will house the door that goes to the roof. It will be covered with plywood and covered with EPDM. The door will cover the opening at the left.
 11-26-02 - The seams have now been glued together. Everything we need to do before winter sets in has been done except that we would like to have a couple more good days so we can get the caulking done at the termination bars around the edges.
Click here for Answers to frequently asked questions about Dupont Castle.
Click here to send E-Mail
to Jim or Patty.
END OF PAGE